Building an Interactive Resume with WordPress
 Publié le 12 September 2024
Impress hiring managers and stand out from other job applicants by building an interactive resume with WordPress.
WordPress is an excellent open-source content management system for building a professional-looking, polished interactive resume. It’s a great choice when getting your credentials out to potential employers.
Its advantages include ease of use, great customization options, and rich multimedia integration capabilities. It allows you to hold the attention of potential employers and significantly increases the chances of them thoroughly reviewing your resume.
In this post, we won’t dwell on what makes a good resume, such as how to best highlight your work experience and skills, use narrative storytelling, or visual elements like progress bars and sliders.
Rather, we’ll focus on the more technical aspects of getting the most out of WordPress to present your carefully crafted interactive resume conveniently and professionally.
If mentioning the word ‘technical’ scares you, don’t worry. WP is highly accessible and easy to use – as you’re about to see, so let’s get started.
Choosing a Hosting Provider and Domain

If you don’t already have a professional website, you’ll need to choose a hosting provider that’s right when building an interactive resume on WordPress. For job seekers, research hosting providers that offer either:
- Shared hosting — An affordable option suitable for small sites and one-page resumes, as resources are shared among multiple websites.
- VPS hosting — This kind of hosting offers dedicated resources on a virtual private server, making it perfect if you’re looking to grow your website eventually and need more performance.
- Managed WordPress hosting — Specialized hosting that’s optimized for WordPress.Depending on your budget, it comes with features like automatic updates and backups, making your WP experience a lot more convenient.
After choosing the right hosting provider, you’ll also need to choose the right domain. Here’s some advice:
- Combining your own name and profession (like ‘janedoephotography.com’) is great for personal branding, it helps clarify what you do, and improves SEO.
- Try to use shorter domain names as they’re easier to remember and type. On the other hand, hyphens, numbers, or other special characters may be confusing and hard to remember.
- Choose the .com extension if available, as it’s by far the most recognized and trusted domain extension.
Installing WordPress
Most hosting providers offer one-click WP installation in their control panel, so this part of the job should be easy. Especially if you’re only looking to use the website for your resume.
However, if you already own a professional website, but you don’t have WP installed on your website, it’s a different story. In this case, it’s best to install WP as a subdirectory.
And the same applies even for a new site if you want to add other subdirectories like ‘About Me’ or your blog after adding the resume.
Subdirectories (example: yourwebsite.com/resume) are usually a better choice for a job seeker’s website than subdomains (example: blog.yourwebsite.com), as they allow you to:
- Benefit from the main domain’s SEO authority
- Provide a cohesive user experience with consistent navigation and design
- Make it easier to manage backups, updates, and security
Here is how installing a WP subdirectory works:
- Create a subdirectory — Using your file manager or FTP client, create a new directory in your website’s root folder (e.g., public_html/resume).
- Upload WordPress files — Download the latest WordPress package from wordpress.org. Extract the files and upload them to the newly created directory using an FTP client or the file manager.
- Create a database — Create a new MySQL database and user in your hosting control panel. Note down the database name, username, and password.
- Run the installation script — Navigate to yourwebsite.com/resume in your browser. Follow the WordPress installation prompts and enter the database details you created.
- Complete installation — Finish the installation and log in to your new WordPress site at yourwebsite.com/resume/wp-admin.
Selecting a WordPress Theme
The theme serves as the foundation of your resume/site, providing essential structure, styles, and features that page builders or plugins can build upon (which we discuss in the third section of this post).
When building an interactive resume with WordPress, it’s time to consider whether a free WP theme will suffice or you’ll go for one of the premium ones.
The top free themes include:
- Hestia — A one-page theme that’s straightforward to set up, making it ideal for beginners who want a professional-looking resume quickly.
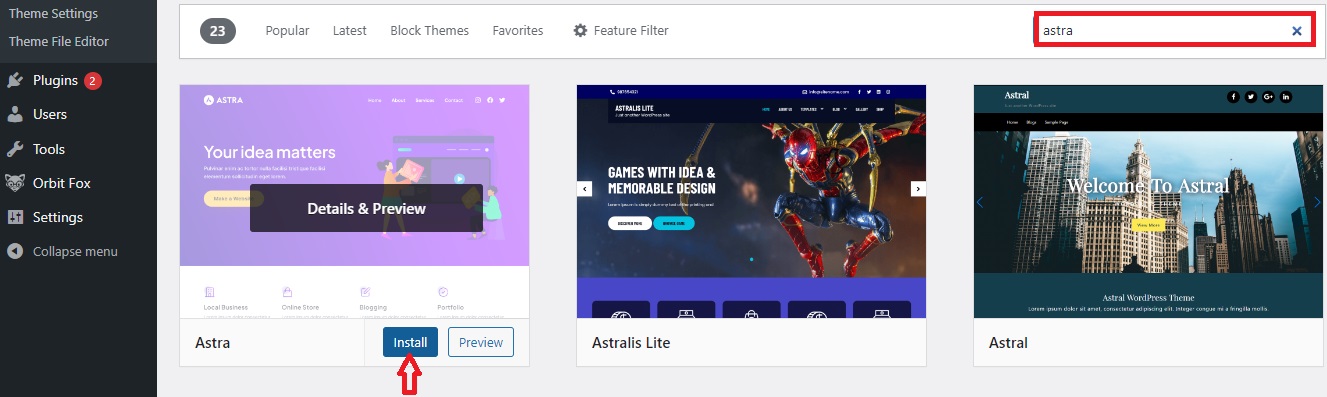
- Astra — A highly customizable theme with numerous pre-built templates that can be tailored to your specific needs.
As for the premium ones, the top picks are:
- Divi — The drag-and-drop builder, numerous pre-made layouts, and the ability to create completely custom designs allow for intricate customization without the need to write code. Divi is currently $89/year, offering a 1-month free trial.
- Resume WordPress Theme on Visualmodo — Features designed specifically for resumes, which ensures that all necessary resume sections are included and well-optimized; offers fewer customization options than Divi. This theme will cost you $59/year.
Either way, to install any theme, head to WP’s ‘Appearance’ section, select ‘Themes’, then ‘New Themes’. Find the theme you’re looking for, click ‘Install’, and then ‘Activate’.
Customizing Your Theme
Regardless of the theme you’ve chosen, it’s now time to head to WP’s ‘Customize’ tab found under the ‘Apperance’ section.
Here, you can (and should) modify the following to create an eye-catching visual resume:
- Colors — Change the primary and secondary colors to match your personal branding. Also, adjust background colors, text colors, and link colors as needed.
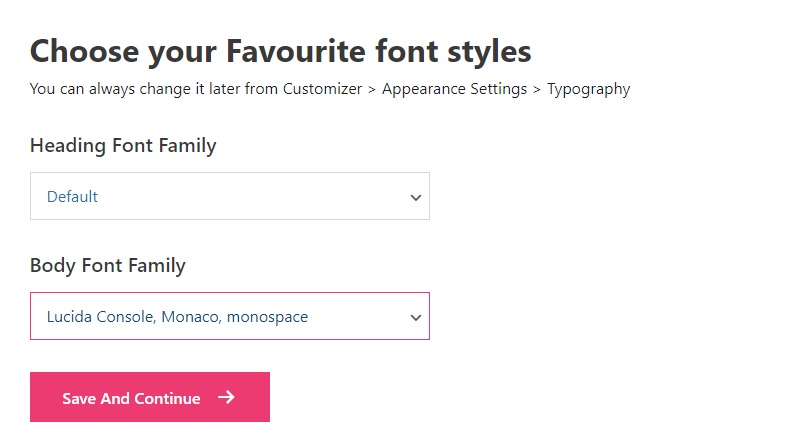
- Fonts — Choose the fonts that best represent your style and enhance readability. This includes adjusting font sizes, weights, and line heights for headings, body text, and other elements.
- Layout — Choose the desired layout for your site (e.g., full-width, boxed). Experiment also with the layout of specific sections such as the header, footer, and sidebars. You should rearrange or hide elements to create a clean, focused resume page.
Adding Your Interactive Resume
With the theme set in place and configured to your liking, you now actually add your interactive resume. Here, you can choose between using a page builder or a WP resume plugin.
If we think of a WP theme as your resume’s foundation, page builders and plugins allow you to build a glorious home for your resume on top of it.
Using a Page Builder
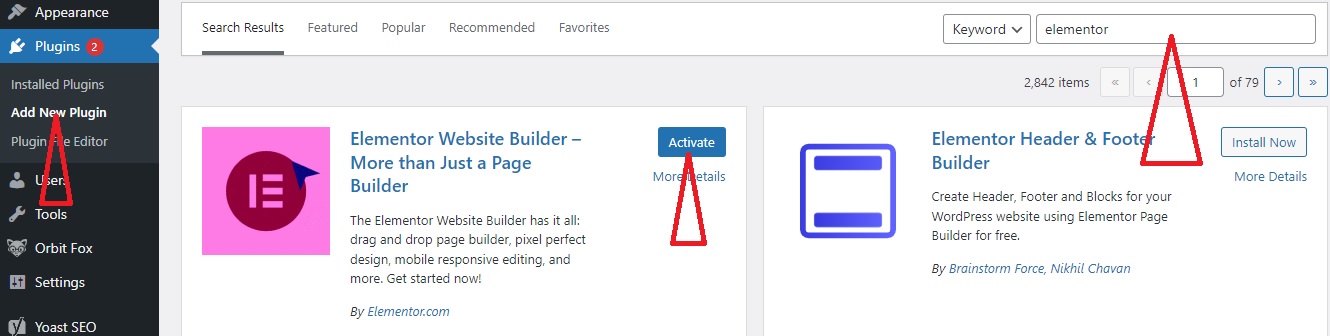
While it may seem counterintuitive, page builders like Elementor or WPBakery may be the better option here. Namely, they:
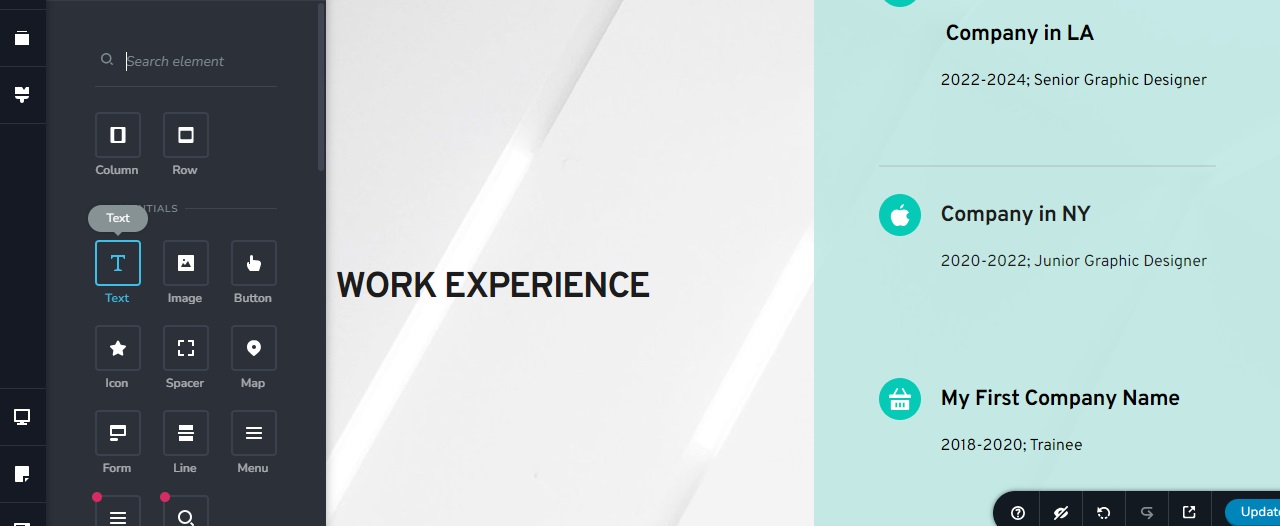
- Provide intuitive drag-and-drop interfaces, making it easy to create and customize layouts without coding knowledge.
- Allow you to create virtually any design you can imagine. You can customize every aspect of your resume, from layout to colors to fonts. This includes advanced elements like when you make a QR code, add accordions, sliders, progress bars, or other interactive features.
- Integrate seamlessly with your existing site’s theme, allowing you to maintain a consistent look and feel across all pages.
Keep in mind that some premium WP themes, Divi included, provide their own, fully functional page builders, eliminating the need to bother looking for a standalone page builder.
To install a page builder, navigate to Plugins [yes, builders too are categorized under plugins in WP] > Add New. Fnd the plugin you’re looking for in the search bar, click on the ‘Install Now’ button, then activate the plugin.
Next, go to Pages > Add New, and start using the page builder to design your resume. Customize the builder’s pre-designed templates and add any interactive elements you need.
Using a Plugin
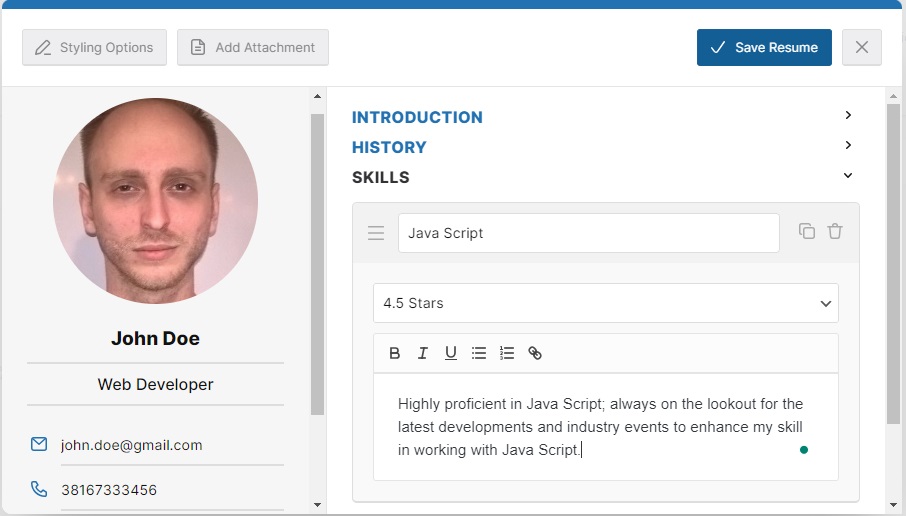
On the other hand, you may choose a resume plugin like WP Resume or Resume Builder if you’re looking for a solution that:
- Provides structured forms to input your resume details, which is easier if you prefer a guided approach and want a clean, professional look without much effort.
- Offers a dedicated resume section that may have a different design from your main theme, which can be a pro or con depending on your preference.
- Is lightweight and will have less of an impact on your site’s performance.
The WP installation steps are the same as those for page builders above.
Once you’re done installing, you’ll need to go to the plugin settings page, configure the basic settings, and use the plugin’s interface to add your resume details and sections.
Enhancing Your Resume with SEO
When building an interactive resume with WordPress, it’s essential to identify and use relevant keywords throughout the content. For example, use terms like “web developer,” “front-end developer,” or specific skills like “JavaScript developer.” If you need assistance developing an effective SEO strategy, you might want to consider outsourced sales development to help you out.
Yoast SEO is a user-friendly plugin that offers features like readability analysis, meta-tag editing (including title tags and meta descriptions), and XML sitemap creation which helps Google crawl and index your page better.
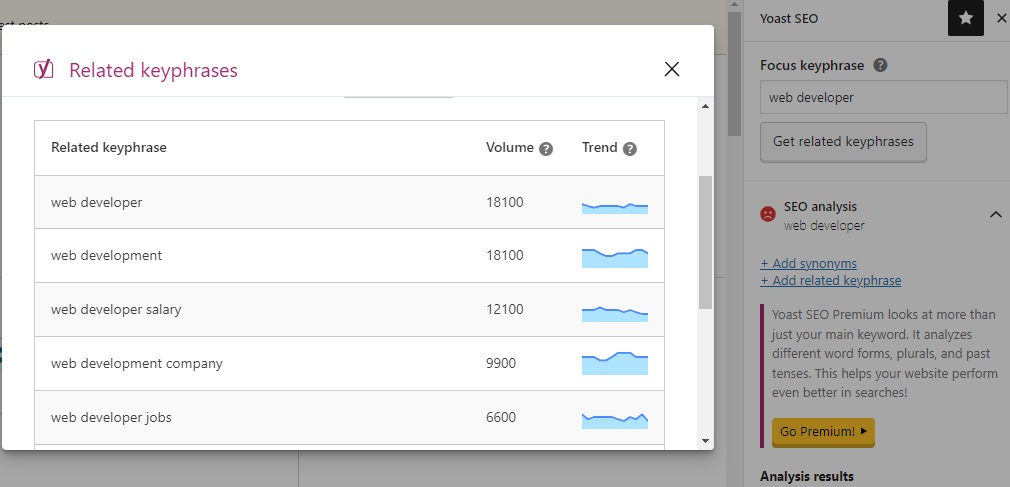
To make your resume more visible on Google, you need to write compelling meta descriptions for each page of your resume (e.g., Home, About, Resume, Portfolio), and optimize title tags with relevant keywords (e.g., “John Doe – Web Developer Resume”).
Images are another thing you need to optimize for higher discoverability by adding descriptive, so-called alt text to all images, using relevant keywords.
Moreover, you can use the Smush plugin to automatically compress images without losing quality, which helps in reducing load times. Which brings us to…
Optimizing Performance
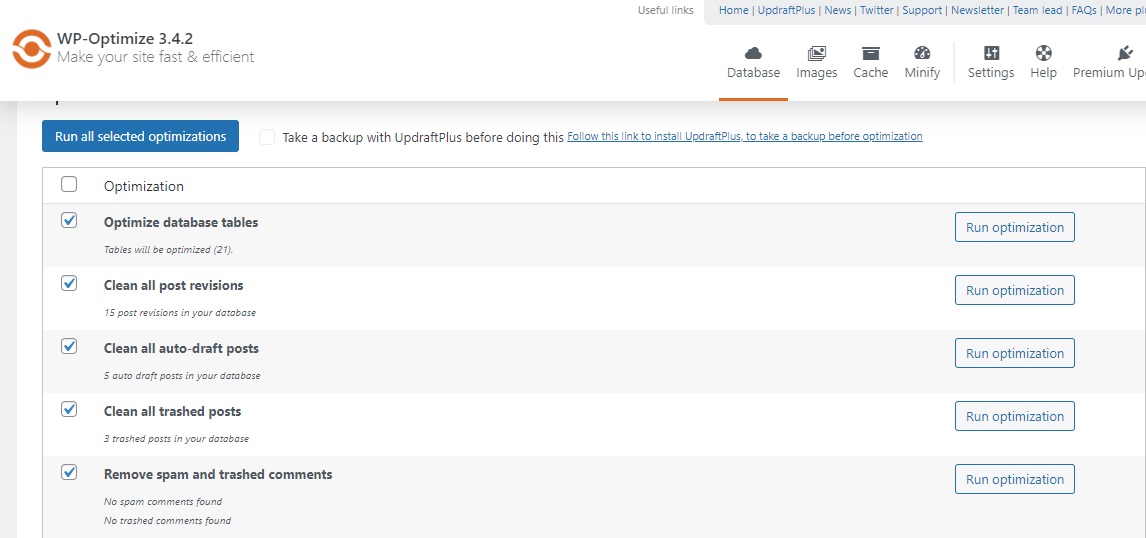
There are two primary avenues for this: database and caching.
- Installing the WP-Optimize plugin will allow you to clean your database by scheduling regular clean-ups to remove unnecessary data, like post revisions and spam comments.
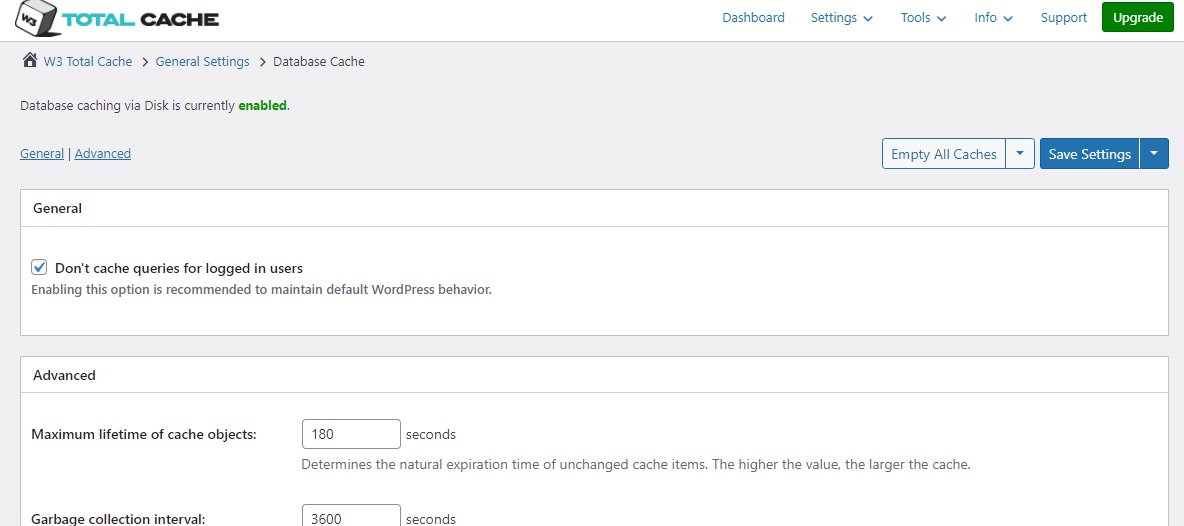
- For caching (i.e. storing copies of files or data in a temporary storage location), we suggest installing the W3 Total Cache plugin. Through its database cache function, it caches queries to the database the load. This is particularly useful for dynamic sites, such as interactive resumes, with lots of database interactions.
W3 Total Cache’s functionalities also include browser caching, i.e. storing certain elements of your site (like images, CSS, and JavaScript files) in the user’s browser. This means that returning visitors won’t need to reload these elements, resulting in quicker page loads.
Transforming Your Job Search with a Dynamic WordPress Resume
An interactive resume is a powerful way to attract more and better potential employers. By building an interactive resume with WordPress, you can easily integrate your portfolio, linking to projects or case studies, organize information effectively with interactive features, and last but not least, create a more engaging and memorable user experience.
And WordPress is just the tool for the job, allowing you to refine and enhance your interactive resume to perfection. So, get to it and that dream job you’re looking for might be just around the corner!